CargoWall Quickstart - Up and Running at Light Speed
)
We promise - it's quick and easy
)
April 7, 2026
CargoWall is an open-source GitHub Action that provides an eBPF traffic control layer to your GitHub Actions workflows. You can specify network egress policies, sudo overrides, and much more. It protects your GitHub Actions workflows from attacks such as the Trivvy and Axios vulnerabilities that are costing companies tens of millions of dollars to fix.
Using CargoWall is simple - here's how to get started in less than 5 minutes!
Step #1 - Find a Workflow (or build your own)
If you have a bunch of GitHub Actions workflows in your GitHub organization, just pick one you can easily run. Preferably it has the
workflow_dispatch trigger (this lets you click a button to run the workflow in GitHub). If you don't have a pre-existing workflow, here's a very simple one to use:name: test-cargowall
on: workflow_dispatch:
jobs: test: name: Test CargoWall runs-on: ubuntu-latest steps: - name: Ping public IP echo run: curl -fsSL https://ifconfig.me/all.jsonStep #2 - Add CargoWall to your Workflow
Next, add the following YAML to your workflow file. You'll need to add it immediately after the
runs-on: statement. The following code will enable CargoWall for your GitHub Actions workflow, configure it to use audit mode (identify external connections but do not block them), and provide permissions so we can allocate a dedicated dashboard for your run on the CargoWall platform. permissions: contents: read actions: read id-token: write steps: - uses: code-cargo/cargowall-action@v1.0.1 with: mode: auditIf you're using the sample
test-cargowall workflow, here's what it will look like:name: test-cargowall
on: workflow_dispatch:
jobs: test: name: Test CargoWall runs-on: ubuntu-latest permissions: contents: read actions: read id-token: write steps: - uses: code-cargo/cargowall-action@v1.0.1 with: mode: audit
- name: Ping public IP echo run: curl -fsSL https://ifconfig.me/all.jsonStep #3 - Commit the Workflow to GitHub
Whether you are creating a brand new workflow or adding to an existing one, get your code on the main branch of your GitHub repository. You might be able to directly commit to the main branch, or you might need to create a pull request.
Step #4 - Run the Workflow
If your workflow can be triggered by
workflow_dispatch, navigate to your GitHub repo, click on "Actions," and you'll see your workflow on the left side of the screen. Click on the workflow and then "run workflow" button.If your workflow can't be triggered in the UI, perform your standard trigger such as a branch push event, etc.
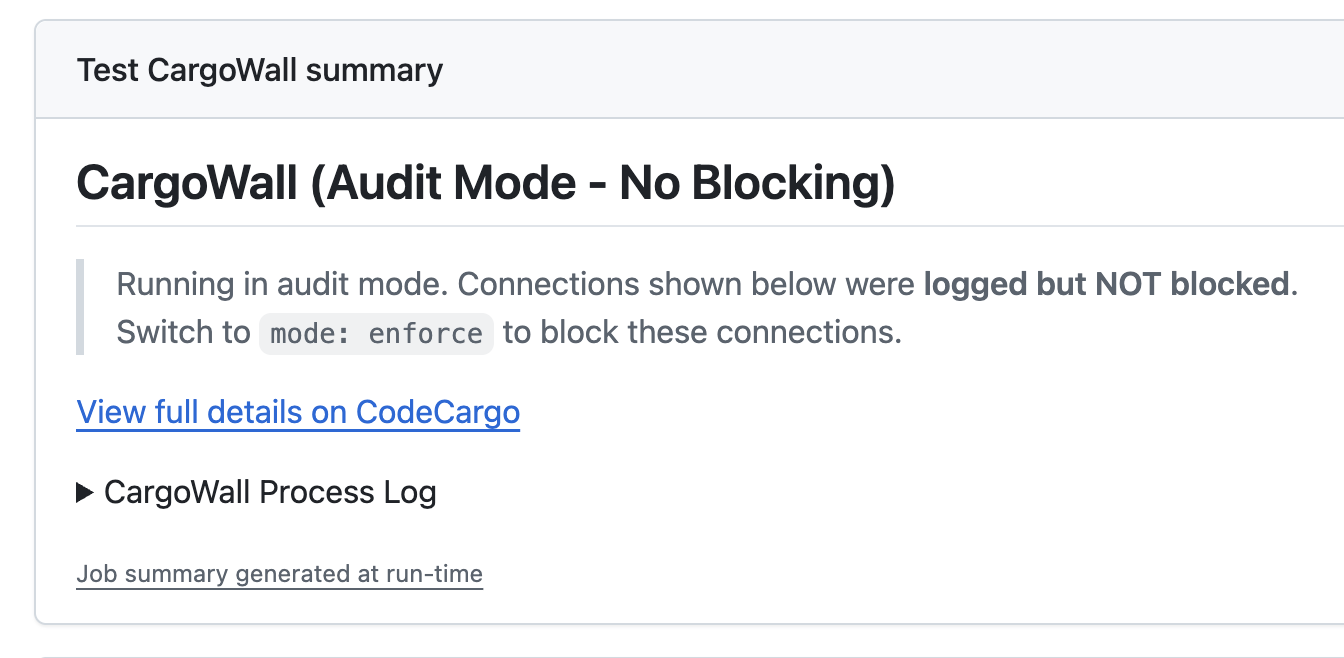
Step #5 - View Results
Once you click "run workflow," your page will be redirected to the workflow run page. Once the workflow run completes, you'll be greeted with the following. This shows that the CargoWall was run in audit mode.
 What's Next?
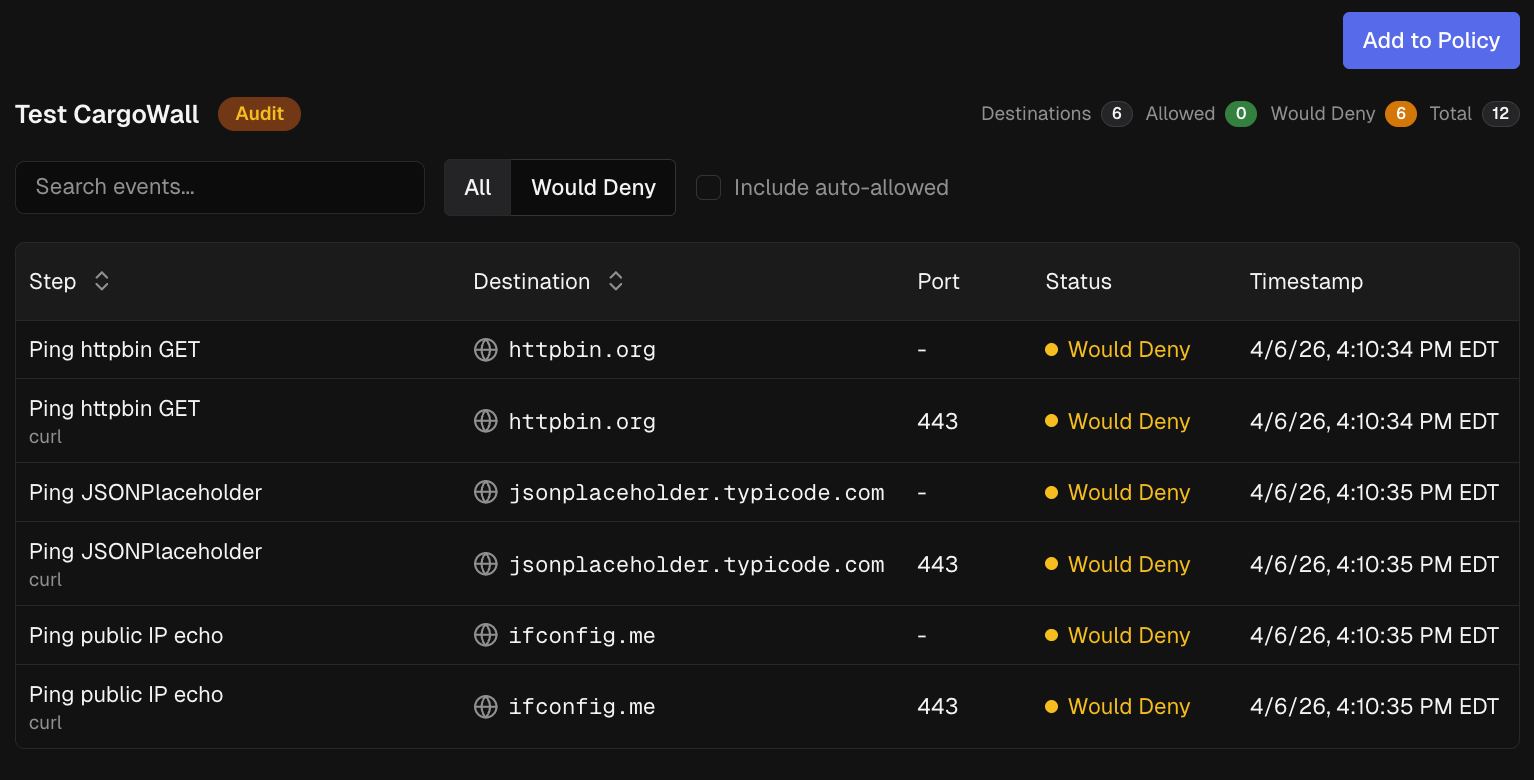
At this point, you have a deep view into your GitHub Actions workflow's egress network traffic. Here's some things you can do next:
- Contribute to the open-source project!
- Enable
mode: enforceto start blocking egress traffic - Setup your other GitHub Actions workflows to use CargoWall
- Create egress traffic policies to prevent unwanted connections
- Sign up for CodeCargo Starter to automatically distribute CargoWall network policies to all your workflows
C
CodeCargo Team
The CodeCargo team writes about GitHub workflow automation, developer productivity, and DevOps best practices.